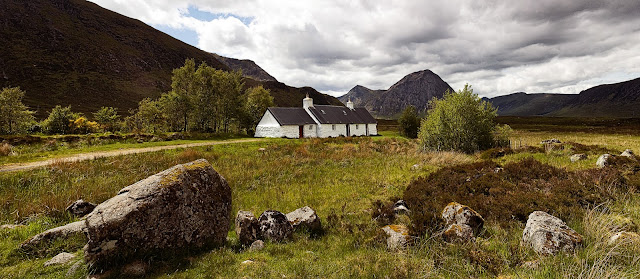
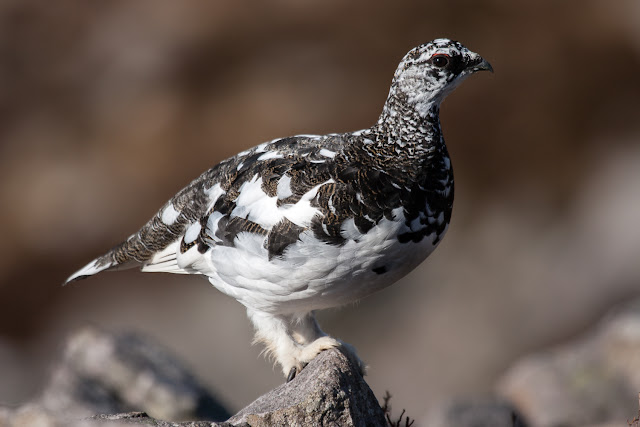
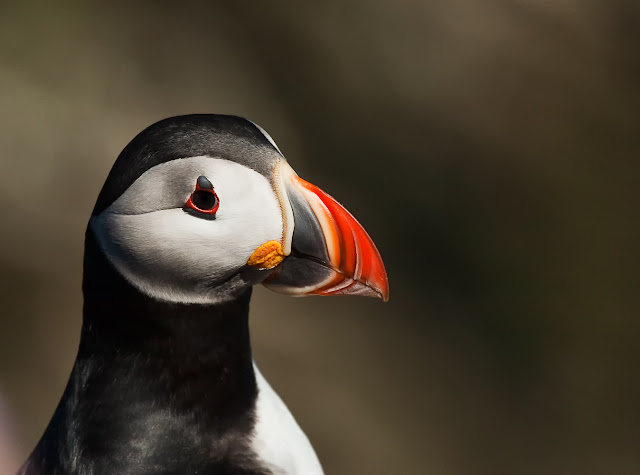
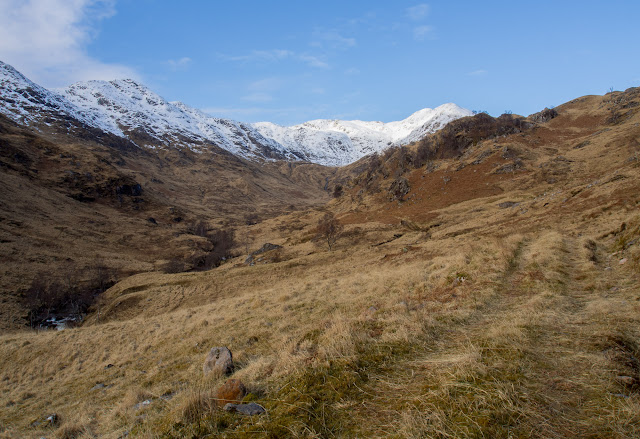
Pages

Wednesday, 13 March 2013

Reorganising folders in Lightroom


I’ve always been a little slack with my photo folders organisation. My normal procedure is I come back from a photo outing with maybe 30 to 40 images; I’m not one for machine gun type photography. The images are imported from the card to an internal hard disk via lightroom 3.6.
I name the folder by the area that I have visited, such as Assynt or Glencoe; all the images on the card go into that folder.
 The problem with this is that if you take photos from another area, such as an interesting landscape that you see on route the name of the folder becomes meaningless.
All my images go onto one disk which only holds photos, that way the disk is never affected by operating system problems which necessitates a reformat.
The disk contains images going back to 2001 and was a mess. The time had come to do a complete reorganisation and Lightroom has all the tools to do this.
I could have gone through each folder in turn and put them into date order and rename them, I didn’t fancy the brain work involved in that.
I decided to let Lightroom do the majority of the work for me and at the same time transfer the images to a new disk.
I made a folder on the new disk ( Lightroom would normally use the default location for this which is in your my Pictures folder on “C” disk). I called this My photo library , inside this folder I made two new folders  one  I called  New lightroom  catalogue and the other Photos
The new Lightroom catalogue had no images in it as yet. I started the import process, I selected the old disk as the source and the new photos folder within my new photo library folder as the destination. I selected Copy photos to a new location and add to catalogue. As I was importing nearly 10,000 images I selected Render minimal previews in file handling to speed the process up, I would render Standard  previews at another  time I also took the opportunity to winkle out any duplicate files by selecting don’t import suspected duplicates .
In Destination I selected Organise by date I choose to have all the images  go into individual day folders within a year folder. So I selected Year/ month-day. The forward slash is important here because that denotes a separate folder. So I would get a year folder and within that folder each day’s images would go into a day folder.
All that remained was to press Import. I hadn’t prepared myself for the time it would take to copy the files to another disk, my 10,000 images took just over two days. Maybe if I had been just moving the images within the same disk it would have been a lot quicker.
I ended up with all the images in their respective date folders
2005
        01-01

        02-01
        02-02
        02-03
        03-01
        03-02
Etc,etc

Lightroom did all this for me but to make it a little more organised I went through each folder and added a name after the folder date.
ie
01-02 assynt.
I could name as many folder assynt as I wanted because the date would always be different.
I now have a tidy folder structure and as long as I import using the same criteria new images will slot in tidily.


Sunday, 3 February 2013

Accidentally deleted blog images stored on Picasa web albums

I have just spent two days replacing all images on my blogs, no mean task. While writing my photography blogs I had uploaded a number of images into Picasa web albums. When it came to adding images to blogs I went into the web albums and selected the image I needed.

 My interpretation was that I was copying these image into the blog - no, I was just linking them from the web albums to the blog.

I wanted to update the web albums so I deleted all images sitting quite happily in Picasa web albums ready to update them. Only when I went into my blog, did I realise what had happened. The text was fine but where there had been images there was now a black rectangle. Even if I had found the export blog button hiding away in settings, which at this time I hadn't, it would have done no good. The export only records the links to the photos not the photos themselves.

My only solution was to upload all the images to Picasa web albums again. I then had to go through each blog and insert the new photos, caption them, size them, place them in the correct place and sort the alignment of the text.

This is now complete and in the future I won't be deleting images that are linked to a blog and also having found the export blog button I now have a copy of the blog on my hard drive.

Learn by your mistakes !!

Saturday, 2 February 2013

Cromarty Firth port mono photos

 
I've just spent an afternoon converting images from my Invergordon trip to monos. Most of them required a little tweeking in photoshop  before being converted to black and white in Silver Efex Pro.

Photos of 16 ton rig anchores with the Sedco 712 in the background
16 ton rig anchores with the Sedco 712 in the background.
Click on image to enlarge

hoto of Sedco 712 , Normand Neptun and CFPA( Cromarty Firth Port Authority) Tug
Sedco 712 , Normand Neptun and CFPA( Cromarty Firth Port Authority) Tug
Click on image to enlarge


Photos of Normand Neptun and Sedco 712 alongside Queens Dock, Invergordon
Normand Neptun and Sedco 712 alongside Queens Dock, Invergordon
Click on image to enlarge

Photo of Sedco 712 and a CFPA tug
Sedco 712 and a CFPA tug
Click on image to enlarge


photo of 16 ton rig anchores
16 ton rig anchores
Click on image to enlarge


Photo of Normand Neptun and Sedco 712 in the Cromarty Firth
Normand Neptun and Sedco 712 in the Cromarty Firth
Click on image to enlarge


photo of two anchore vessels and the oil rig Sedco 712
The anchore vessels Normand Neptun and the Highland Valour towing the oil rig Sedco 712
Click on Image to enlarge

Monday, 28 January 2013

Photographing The oil rig Sedco 712 in the Cromarty Firth


SEDCO 712         
More images from this set       Here                                                                  
Phil Restan Photography              Here

I recently had an opportunity to visit the port at Invergordon in the Scottish Highlands to photograph the oil rig SEDCO 712 being moved from its anchorage on the Cromarty Firth by the two anchor vessels, Normand Neptun and Highland Valour to the Queens dock at Invergordon.

Image of the Sedco 712 Oil rig
The Sedco 712 in the Cromarty Firth
Click on image to enlarge


The port situated on the Cromarty firth is the north of Scotland’s leading port for the offshore energy industry, having deep water anchorages and high quality maintenance facilities. I was very lucky that we were experiencing fairly mild weather and temperatures were hovering around 2 or 3 degrees, the only down side to this was heavy grey cloud cover, not ideal photography weather but I wasn’t in a position to change that, at least I wasn’t expecting to freeze


The Normand Neptun starts to tow the Sedco 712 towards the quay at Invergordon
The Sedco 712 was to be tugged by the Normand Neptun and Highland Valour with the assistance of two CFPA( Cromarty Firth Port Authority) tugs from an anchorage about 1 ½ miles from the quay at Invergordon where it was going to be tied up for the next eight months or so. I’d arrived at first light, around 8am expecting the rig to be moving towards me fairly soon. However I hadn’t taken into consideration the time it might take to lift the anchors, bearing in mind these things can weigh anything between ten to twenty tons; sixteen tons would be a fair guess at the ones this rig was using.


16 ton Rig anchors with Sedco 712 in the Cromarty Firth

16 ton Rig anchors
Click to enlarge

I was expecting to use three lenses Canon 28-135 f3.5-5.6 is, a Canon 17-40 f4 and Canon 24-70 f2.8 fitted to my trusty old Canon 5D mk 1
I soon found that because of the dull conditions the Canon 17-40’s wide angle was too wide , bringing in too much of the surrounding dull landscape so that was soon packed away. The Canon 28-135 proved useful for the distance shots as the rig was moved from its anchorage by four tugs. The main towing tug was the 80 metre long Normand Neptun, with the Highland Valour also 80 metres but slightly lighter taking up the rear . Two smaller Cromarty firth port tugs were also assisting.
The Sedco 712 with The Anchor vessels Normand Neptun and  Highland Valour and two Cromarty Firth port tugs
Click on image to enlarge

As far as movement is concerned, nothing really happened till around 11am when I realised the Normand Neptun and the Sedco 712 was slowly moving, I started shooting but soon realized that I was going to have masses of very similar shots if I carried on as I was. It was a case of trying to be patient and pick my shots. The Canon 24-70 L  was invaluable, sharp, fast enough to freeze movement and wide enough to get the Normand Neptun  and rig in the shot comfortably.


Normand Neptun towing the Sedco 712

It was close to 11.30am before the Vessels and rig were close enough to my position for me to be able to get some of the more interesting shots.

Normand Neptun and Highland Valout with the Sedco 712
Click on image to enlarge
 
Normand Neptun moving towards the Quay with Sedco 712
Click on image to enlarge
There was a lot of manoeuvring going on close to where the rig was to eventually be tied up,  at 1.30 pm I decided to leave as getting the rig in was obviously going to take some time and light would be fading by the time it was secured. It would make more sense to return when conditions were better , the Sedco 712 wasn’t going anywhere for several months.

Normand Neptun and Sedco 712
Click on image to enlarge


Normand Neptun towing the Sedco 712
Click on image to enlarge


Wednesday, 11 April 2012

Highland cow photos


Highland cows are great photography subjects. Generally they are calm and can be approached safely, however if you intend to approach cows that you’re not familiar with especially if there are calves it’s probably best to ask the owner if this is ok.
Photo of a Highland cow from Crask in Sutherland, Scottish Highlands
A Highland cow from Crask in Sutherland, Scottish Highlands
Click on image to enlarge
Highland cows can either be photographed to fit in with their surroundings such as those in mountains or rough terrain or, close up to get impact, head on filling the frame.
A bull Highland cow
Click on image to enlarge
Living in the North Highland there is an abundance of highland cows, although I have never managed to get a photo of a mother and calf.
Photo of a Highland cow from Lairg in Sutherland, Scottish Highlands
A Highland cow from Lairg in Sutherland, Scottish Highlands
Click on image to enlarge
This photo of katrina won photo of the month on the Digital photographer website and was published a number of times in their magazine.
 This photo of a Highland cow named Katrina won photo of the month on the Digital Photographer website.
Click on image to enlarge
A black Highland cow
Click on image to enlarge


Highland cows can be found in some strange places
Click on image to enlarge
 

A more naturally processed Highland cow
Click on image to enlarge

Another Lairg Highland cow
Click on image to enlarge

Photo of a digitally manipulated Highland cow
Ghosts of Highland cows are found in the Scottish Highlands
Click on image to enlarge


Wednesday, 4 April 2012

Overland photography trip to Loch Coruisk, Skye


Last weekend promised to be the warmest weekend this year so, to make the most of it, a trip to Skye was planned.
Having visited Elgol many times and taken photographs looking towards the Cuillins and Loch Coruisk, we decided we wanted to go and visit the loch.
Photo of Loch Coruisk Isle of Skye
Loch Coruisk Isle of Skye
lick on image to enlarge
We could have taken the boat from Elgol to the loch, but we wanted to camp out for one night at the loch. This could lead to us being stranded if the weather should change and the boat failed to return. We planned to hike out from Sligachan Hotel to the loch, about nine miles over the
mountains.

Photo of Loch a Choire Rhaich, Skye
Approaching Loch a Choire Rhaich, Skye
Click on image to enlarge


Photo of Loch a Choire Rhaich, Skye
Loch a Choire Rhaich, Skye
Click on image to enlarge


Carrying about 35 pounds of camping and camera equipment, we made the loch by early evening, just as the sun was disappearing down behind the mountains.
Photo of Loch Coruisk Isle of Skye
Early morning at Loch Coruisk Isle of Skye
Click on image to enlarge
The morning produced no sunrise to speak of and visibility was not too good, with a haze that restricted views of the distant mountains. Also, the wind had increased to cause ripples on the loch so that there were no reflections.
However, we did get a few reasonable images of the loch and mountains that surround it. All in all a good trip that made us feel we want to go back sometime.
Photo of loch Coruisk, Isle of Skye
Early morning at loch Coruisk, Isle of Skye
Click on image to enlarge


Thursday, 29 March 2012

Trip to Glen Coe, Scottish Highlands


Continuing the theme of Highland photography can be frustrating, a couple of weeks ago we took a trip to the Glen Coe area. The idea was to go into the mountains north east of Kinlochleven above Loch Eilde Mor. We wanted some mountain photos off the beaten track. This area certainly fitted the bill.
Photo of my wife Sue above loch Eilde mor
My wife Sue above loch Eilde mor
Click on image to enlarge
The forecast was not particularly bad so we were expecting to get some decent photography weather, how wrong we were! When we set off, the mountains were shrouded in mist.We had decided to hike up into the mountains and camp overnight. This would give us the chance of  some sunset or  sunrise images. The weather got progressively worse, with a damp mist enveloping the glens.


Photo of overnight camp beside Loch Eilde mor
Camped overnight beside Loch Eilde mor
Click on image to enlarge
We decided that the best approach was to camp beside Loch Eilde Mor and see what the weather was like in the morning. All thoughts of photography the first day went out the window.
My wife Sue above loch Eilde mor
Click on image to enlarge
Photo of Loch Eilde mor
Loch Eilde mor
Click on image to enlarge
The following morning was a little better and we decided to hike up to a point about 2,400ft above the loch. As we arrived, grey cloud was the main problem for photography.
However, we did get a couple of shots which told us that the area was worth another visit when conditions were better.
Photo of Coire an lochain, above loch Eilde mor
Coire an lochain, above loch Eilde mor
Click on image to enlarge